For most homeowners, getting a new roof is a significant undertaking—one that involves careful planning, clear expectations, and trust in a qualified roofing contractor. Whether you’re upgrading for better protection, addressing age-related damage, or improving curb appeal, understanding the roof replacement process is essential to ensure a smooth experience from start to finish.
At Life Time Warranty Roofs, we believe every homeowner should feel confident and informed when it’s time for a roof replacement. Here’s what you can expect—step by step—during your new roof installation, including details about the materials, labor, cleanup, and more.
Phase One: The Planning Phase – Inspections, Estimates, and Scheduling
The first step in any roofing project is the thorough roof inspection. A professional roofing contractor will carefully examine your roof’s condition, looking for signs of aging, leaks, loose nails, missing shingles, and structural damage.
During this time, the contractor will also inspect the roof deck to determine if necessary repairs are needed before the roof installation process begins. Based on these findings, you’ll receive an estimate that includes labor costs, roof replacement cost, and the total project cost, including all necessary roofing materials.
You’ll also choose the right roofing material for your home. Asphalt shingles, especially Owens Corning Roofing products, remain one of the most common roofing materials due to their durability, affordability, and wide range of color options.
Don’t forget to discuss logistics during this phase, such as:
- Scheduling the installation day
- Ordering a dump truck or secondary dumpster for old roof and other debris
- Arranging ancillary services like portable restrooms or handling solar panels if needed
Phase Two: Preparation and Safety Measures
In the weeks leading up to installation, your roofing company will coordinate timelines and order new materials. On installation day, expect the crew to arrive early, ready with the full roofing system, including:
- Starter shingles
- Underlayment installation
- Ice and water barrier
- Roof shingles
- Hip and ridge shingles
- Roofing nails
- Flashing and drip edge
The crew will take appropriate measures to protect your home and landscaping from falling debris, setting up tarps and safety gear around the work area.
Phase Three: Removing the Old Roof
The first physical step in the roof installation process is the removal of the old roof. This process can be noisy and messy—but it’s crucial for proper installation.
The roofing team will strip away old asphalt shingles, underlayment, and inspect the exposed roof deck. Any rotten wood or compromised decking will be replaced, ensuring a strong foundation for the new shingles.
This is also when roof installation starts in earnest. Depending on the size and complexity of the job, removing the old roof and preparing the surface can take several hours to a full day.
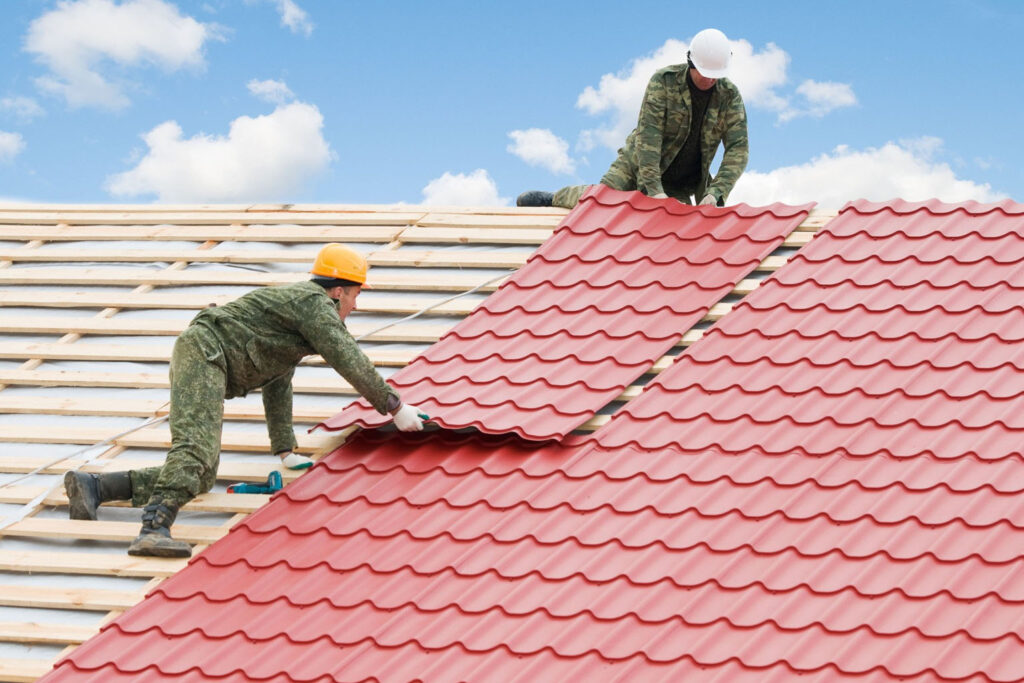
Phase Four: New Roof Installation – Layer by Layer
Once the decking is solid, the team begins installing your new roof. This includes:
- Installing underlayment to act as a waterproof barrier
- Placing the ice and water barrier along the bottom and side edges, valleys, and around penetrations like chimneys or skylights
- Installing starter shingles to ensure wind resistance at the eaves
- Beginning the shingle installation process using high-quality roofing nails
- Capping it all off with ridge shingles and hip and ridge shingles to protect the roof ridge
Each layer plays a critical role in protecting your home from the elements, and proper installation is key to performance and longevity.
Phase Five: Final Touches and Clean Up
After installing shingles, the crew completes any remaining flashing work and conducts a final roof inspection to verify everything was done to spec. At this point, the roofing professionals will:
- Clean the worksite thoroughly
- Collect and dispose of roofing materials, packaging, and other debris
- Use magnets to find and remove stray nails from your lawn and driveway
- Ensure gutters and downspouts are clear of debris
A good roofing contractor will also walk you through the finished product, address any concerns, and conduct a final walk through.
Phase Six: Final Inspection, Payment, and Peace of Mind
Before making your final payment, you’ll get documentation outlining your warranties—both on the materials and the roof installation itself. Be sure to ask about:
- The installation inspection checklist
- Maintenance tips to extend the life of your new asphalt shingles
- What to expect during severe weather or high winds
- Signs that indicate wear or failure
Once everything checks out, you’ll receive your final paperwork and warranty documentation—and your roof replacement will officially be complete.
What to Expect with the Roof Replacement Cost
Roof replacement cost varies depending on factors like:
- Size and pitch of your roof
- Type of roofing materials
- Location and labor availability
- Removal of old roof layers
- Any ancillary services like solar panel handling or ventilation upgrades
Most homeowners can expect a roofing project to take 1–3 days and to cost anywhere from several thousand to tens of thousands depending on complexity and materials. While asphalt shingles remain the most budget-friendly, options like metal or slate come at a higher price point.
Final Thoughts: Trust the Roofing Professionals
Replacing your roof isn’t something you do often—and it shouldn’t be taken lightly. From choosing the right roofing material to ensuring proper installation, every phase of the roof replacement process matters. With the right crew, clear communication, and attention to detail, the project can be smooth, stress-free, and rewarding.
At Life Time Warranty Roofs, we take pride in our transparency, our craftsmanship, and our commitment to every homeowner we serve. Whether you’re in the early stages of planning or ready to schedule your new roof installation, we’re here to guide you every step of the way.
Thinking about a new roof? Contact Life Time Warranty Roofs for a free roof inspection and get expert advice tailored to your home, budget, and goals. Let us help you protect what matters most—with confidence.
